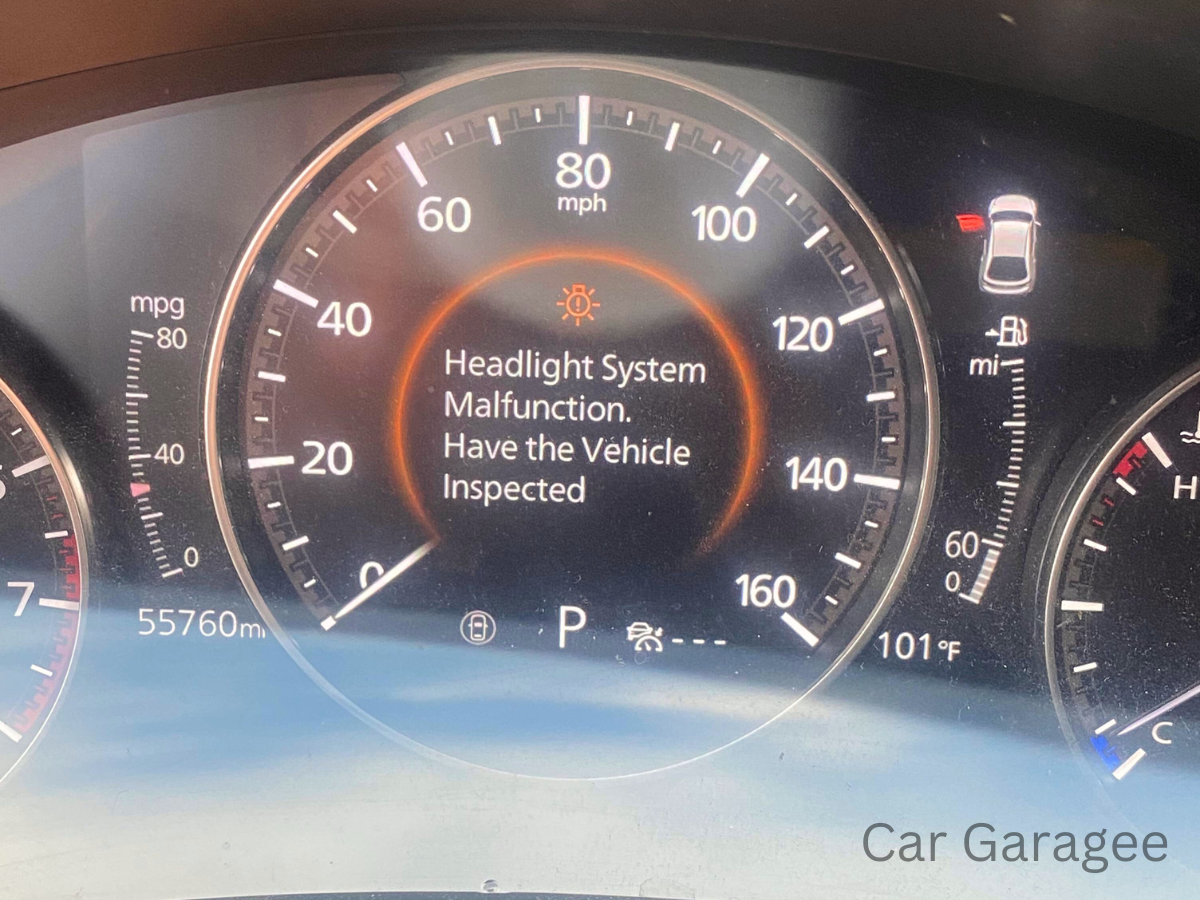
Having fully functional headlights is crucial for safe driving, especially at night. In this blog, we’ll simplify common issues related to Toyota’s headlight system malfunction, ensuring that anyone can understand the steps to diagnose and fix these problems, even if you’re not car-savvy!
Common Causes of Headlight System Malfunction

Burnt Out Headlamps
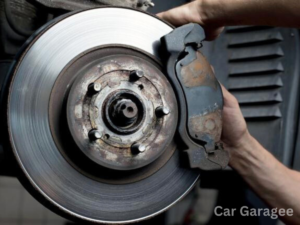
One of the most common reasons your Toyota’s headlights might fail is due to a burnt-out bulb. Typically, a headlamp should last around 1,000 hours of use. If yours burn out sooner, it’s time to replace them—usually in pairs to ensure they illuminate evenly.
Auto-Leveling System Issues
Toyota vehicles often feature an auto-leveling system for headlights, which adjusts the beam based on vehicle load and road conditions. If your headlights seem misaligned or fail to adjust, this system might be malfunctioning. This issue is usually indicated by a specific dashboard warning light, suggesting a trip to your mechanic for a proper diagnostic test.
Environmental Factors
Headlights can also suffer from exposure to water, mud, or debris. Such elements can sneak into the headlight system casing, dirtying or even damaging the internal components, including sensors. Regular cleaning and checks are vital, especially if you frequently drive in wet or muddy conditions.
Personal Mechanic Insight
As a professional mechanic with years of experience specializing in Toyota vehicles, I’ve seen my fair share of headlight problems. Many drivers come in after ignoring early warning signs, which can lead to more severe issues or even safety hazards. My advice? Please don’t wait until it’s too late. Addressing dashboard warnings early can save you time and money.
How to Diagnose and Address These Issues

Solving headlight system issues often requires a mix of DIY solutions and professional assistance. Here’s a step-by-step guide to addressing common problems:
Replacing Burnt-Out Bulbs
Identify the Problem
First, check if your headlight looks dimmer than usual or is completely out. If one headlight is significantly less bright or isn’t working at all, it’s likely the bulb has burnt out.
Access the Headlight Assembly
To get to the bulb, you’ll need to open your car’s hood. Once you’ve done that, look for the back part of the headlight assembly. This is usually located near the front of your car, just behind the headlight lenses. Your car’s manual will have specific instructions on how to find and access this part of your Toyota.
Remove the Old Bulb
Now that you’ve found the headlight assembly:
First, disconnect the power connector. This is usually a plug that attaches to the back of the bulb.
Next, you may see some clips or screws holding the bulb in place. Remove these carefully.
Finally, gently twist the old bulb to free it from the socket.
Install the New Bulb
When handling the new bulb:
Avoid touching the glass part with your bare hands. Oils from your skin can get on the glass and cause the bulb to wear out faster or even burst when it heats up. Use a clean cloth or gloves if possible.
Carefully insert the new bulb into the socket and twist it to secure it in place.
Reattach the connector and any clips or screws you removed earlier.
Test the Headlights
Before closing the hood:
Turn on your headlights to check if both are working and shining brightly.
Look at them from the front of your car to make sure they are aligned correctly and evenly bright.
Cleaning Headlights and Sensors

Step-by-Step Guide to Clean Headlight system and Sensors
-
Prepare Your Cleaning Solution
You have a couple of options for creating an effective cleaning solution for your headlights:
Headlight Cleaner:
You can buy a cleaner made specifically for headlights at any auto parts store. This solution is formulated to handle the grime and oxidation that build up on headlight lenses.
Vinegar and Water Mixture:
If you prefer a DIY approach or a more natural solution, mix vinegar with water. A good ratio is about one part vinegar to two parts water. Vinegar is great for cutting through tough dirt.
-
Clean the Lens
Once you have your cleaning solution ready, follow these steps to clean the lens:
Dampen a Soft Cloth:
Dip a soft, clean cloth into your cleaning solution. Wring it out a bit so it’s not dripping wet.
Gently Wipe the Headlights:
Use the cloth to wipe the outside of each headlight carefully. Move in small, circular motions to lift and remove the grime and oxidation. Be thorough but gentle to avoid scratching the lens.
Repeat if Necessary:
If the headlights are very dirty, you might need to apply the solution a few times. Just make sure to use a fresh part of the cloth each time to avoid spreading the dirt around.
-
Dry and Polish
After cleaning the headlights:
Dry Them Well: Use a clean, dry cloth to wipe down the headlights. This removes any remaining solution and helps prevent streaks.
Apply a Polish (Optional):
If you want your headlights to look extra shiny, you can apply a headlight polish or wax. These products can also help protect the lens from future dirt and damage. Just follow the instructions on the product for the best results.
-
Clean the Sensors
Many modern Toyotas have sensors around the headlights that help with various functions, like adjusting the beam or turning on the lights automatically:
Locate the Sensors:
Check your car’s manual to find where the sensors are located around the headlights.
Gently Brush Off Dirt:
Using a soft brush or a clean microfiber cloth, lightly wipe each sensor. Be careful not to press too hard – these sensors can be delicate.
Keep Sensors Unobstructed:
Make sure nothing is blocking the sensors, like leaves or other debris, so that they can function correctly.
Addressing Auto-Leveling Issues

Check for Warning Lights:
If there’s an auto-leveling system warning light, this typically requires professional diagnostics.
Visit a Certified Mechanic:
They can run a diagnostic test to identify the specific issue and reset or repair the system accordingly.
Regular Professional Checks
Scheduled Inspections:
Regular check-ups can prevent problems before they start, ensuring all electrical connections and physical components are functioning correctly.
By following these detailed steps, you can effectively address and prevent most headlight system issues in your Toyota, maintaining both functionality and safety on the road.
When to Visit a Dealer
If basic troubleshooting doesn’t resolve the problem, or if dashboard warnings continue, it’s time to visit your dealer. Certified technicians can handle more complex issues like system resets or electrical faults that are not advisable to tackle yourself.
Read More:
Red Car with Key Symbol on Dashboard Nissan: What It Means & How to Respond
How To Install The Navigation App On A Toyota? A Comprehensive Guide
6 Common Problems After Engine Replacement
Latest Advancements and Expert Tips in Headlight Technology and Maintenance

Smart Headlight system That Adjust Automatically
What They Are:
Some new car headlights can change how they shine so they don’t blind other drivers but still let you see well. These are called Adaptive Driving Beams (ADB).
Why They’re Good:
These headlights use cameras to see where other cars are and change the light to make driving safer for everyone.
Brighter and Longer-Lasting Lights
What’s New:
Cars are now using LED and laser lights more than the old kind. They last longer and use less battery power.
What’s Great About Them:
These lights make it easier to see at night, and they also look cool because they can be made in fun shapes.
Headlights That Know the Road
Super Smart Headlights:
Some of the newest headlight system work with the car’s map system. They can get ready to light up turns in the road before you even start turning the steering wheel.
How It Helps:
This means you can see better and react faster, which makes driving at night much safer.
Tips to Keep Your Headlights Working Well
Keep Them Pointed Right:
Sometimes, headlights can get a little off track. It’s a good idea to check them to make sure they point straight ahead so you can see them properly.
Thinking About an Upgrade?:
If your car is older, consider installing new kinds of lights like LEDs. This can make your car safer and look newer.
Tools That Guess When Lights Might Stop Working
Future Tools:
There might be new tools soon that use computers to guess when your headlights need fixing. This way, you can fix them before they even start causing trouble.
Conclusion
Ignoring a headlight system malfunction can not only lead to costly repairs but also put your safety at risk. Always take headlight warnings seriously and act promptly. Whether you fix an issue yourself or visit a dealer, maintaining your vehicle’s headlights is essential for safe driving.
FAQS
1) How do you reset the headlight system malfunction?
If your car’s headlights aren’t working right, it might be a sign to check the battery. Sometimes, the battery gets weak and messes up the headlights. Here’s a quick fix:
Check the Battery:
Make sure the battery isn’t too old or weak. You should get it tested or even get a new one if it’s not working well.
Reset the System:
To reset your headlights, you can disconnect the battery’s negative cable (that’s the black one). Leave it off for a few minutes. Then, put it back on. This can sometimes fix the headlight problem by giving the system a fresh start.
2) What does a headlight error mean?
Seeing a “headlight system error” can be worrying, but it usually means something is not right with the headlights. Here’s what you can check:
Check the Fuses:
Sometimes, a fuse that controls the headlights might blow. Try switching between the high and low beams to see if both are working.
Look at the Relays and Wiring:
If the fuses are fine, the problem might be with the relays or the wires. These parts help power your headlights, and they might need replacing if they’re not working right.
Consider the Headlight Assembly:
If everything else looks good, the whole headlight system assembly might need to be replaced. This is more complicated, so you should ask a mechanic for help.
3) How do you fix adaptive headlight system malfunction?
Adaptive headlights are smart—they change direction based on where your car is going. If they stop working, here’s what you can do:
Clean the Sensors:
These headlights use sensors to figure out where to shine. Please make sure the sensors are clean because dirt can confuse them.
Check the Bulbs and Ballasts:
Look at the bulbs and ballasts (that’s the part that helps the bulb work). If they look burnt or broken, you’ll need to replace them to get your headlights working right again.
4) What is a headlight sensor?
A headlight system sensor is like a helpful friend for your car. It watches how dark it is outside and turns the headlights on or off to help you see better. Not all cars have them, but they’re great for:
Automatic Adjustments:
The sensor can turn the headlights on as it gets dark and off when it’s light to save your car’s battery.
Keeping the Battery Healthy:
By managing when the headlights are on, the sensor helps keep the battery from running down too quickly.